

The Introduction :
As you probably know very well by now, the internet is made up of a bunch of interconnected computers called servers. When you are surfing the web and navigating between web pages, our browser requests information from any of these servers. The chart below explains explicitly on the request.
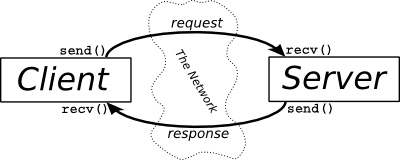
That is, our browser sends a request, waits for the server to respond to the request, and (once the server responds) processes the request. All of this is governed by protocols or rules which is a topic for another day.
Application Program Interface (API)
Now the Wikipedia definition of the API will tell you, an Application Programming Interface (API) is a set of subroutine definitions, protocols, and tools for building  application software. But in layman terms , in the context of the web, the API’s generally allow you to send commands to programs running on the servers that you connect to from your browser or with the browser itself. This allows you to access resources only available on the server. A common usage is of the authorisation feature to login to websites.
XMLHttpRequest :
Now there are countless tutorials out there executing the requests via JavaScript or an extended framework of the same. For starters, the remainder of the tutorial is focused on plain vanilla Javascript and could be cumbersome( Angular JS does the same in half of the number of lines *sighs!*). All that being said, lets actually see the code and later break it down one by one.
    API testing


        var xhr=new XMLHttpRequest();
        xhr.open("GET","http://ipinfo.io/json", true);
        xhr.send();
        xhr.addEventListener("readystatechange", processRequest , false);
        function processRequest(e){
        if(xhr.readyState == 4 && xhr.status == 200) {
            var r = JSON.parse(xhr.responseText);
            var dis = "current IP:" + r.ip
            document.write(dis);
        }}
The above code is in a simple HTML file. Now any JavaScript code that we write goes under the script tag of the code. Explicitly mention type=text/javascript .
1] Initialising object and sending request :
varxhr =newXMLHttpRequest();xhr.open('GET',"//ipinfo.io/json",true);
The above block initialised the xhr variable with the request. Now open is a method which takes three arguments to carry out the requests. It takes in GET( in this case) to specify it’s action, //ipinfo.io/json, for where it getting it from and true/false for executing the request asynchronously/synchronously. On a quick glance, up until now we have set the request prameters , but have not sent it yet,
xhr.send();
Now even when the request is sent, other parts of your code are run not awaiting confirmation for the request from the server side. This makes the user experience much better than a synchronous request which will probably through most users off! Now I hope it’s more clear on why we used the asynchronous ( TRUE ) request instead.
2] Readystate and readystatechange
Now by the time we have actually sent requests to the browser, it’s important to know the state of the request. For this we use the the readystatechange. While this still can indicate on the status of the request, readystatechange event being tied to our XMLHttpRequest object’s readyState property makes it difficult to just parse the data soon afterwards. The readyState changes a 5 set value ranging from 0 to 4. The exact status is mentioned below in the tabular column.

credits : www.kirupa.com
So practically the readystatechange event is being fired 5 times, but in actuality we are only interested in the final state of the request ( 4- DONE) . Secondly the the Http status codes we all know about, for example
202 – Accepted ; 200 – OK ; and the most hideous 404 – Page not found (Bad request)
So even if our event state is an ideal “4”, we don’t want to return “empty” successful requests. We need the return of the content we requested to the server. Hence we write the following condition in our function
function processRequest(e){
        if(xhr.readyState == 4 && xhr.status == 200) {}
           }
3. Parsing data and final end output
Now the request to the server has returned successfully with the data we have to parse into user readable text. So based on the data type we access we have to choose alter paths. For instance this current data is in the form of JSON.

Now we parse this particular JSON dataset to get the ip parameter alone for the purpose of this tutorial.
var r = JSON.parse(xhr.responseText);
var dis = "current IP:" + r.ip + "
"
document.write(dis);
What this does is it initialises a new variable with the parsed return data and uses the variable to access parts of it.
So hope this helps, suggestions are welcome at mrahul.krishnan@gmail.com as always or drop a comment below. Until next time, bye!

var RequestData = function(a, b, c, d) {
var e = new XMLHttpRequest;
e.open(a, b, !0), e.onreadystatechange = function() {
if (4 == e.readyState && 200 == e.status) {
var a = e.responseText;
d(b, a)
}
}, “GET” == a && e.send(), “POST” == a && e.send(c)
};
This function can be a better abstraction, for the above!
Also, jQuery can do it much better, with support for Internet Explorer.
code copied verbatim from https://www.shrimadhavuk.me/js/index.js
LikeLiked by 2 people
Reblogged this on APILama and commented:
I really liked this detailed guide to consuming APIs through Javascript. No matter if you are using ReactJS or Angular or any other frontend framework, this is basic knowledge that you have to deal with at some point. Rahul leads by example here. A must read in my opinion.
LikeLiked by 2 people